Paid feature. Client VPN is a flat-rate add-on; there is no per-account charge. Each MSP can create one management Client VPN account per customer at no charge.
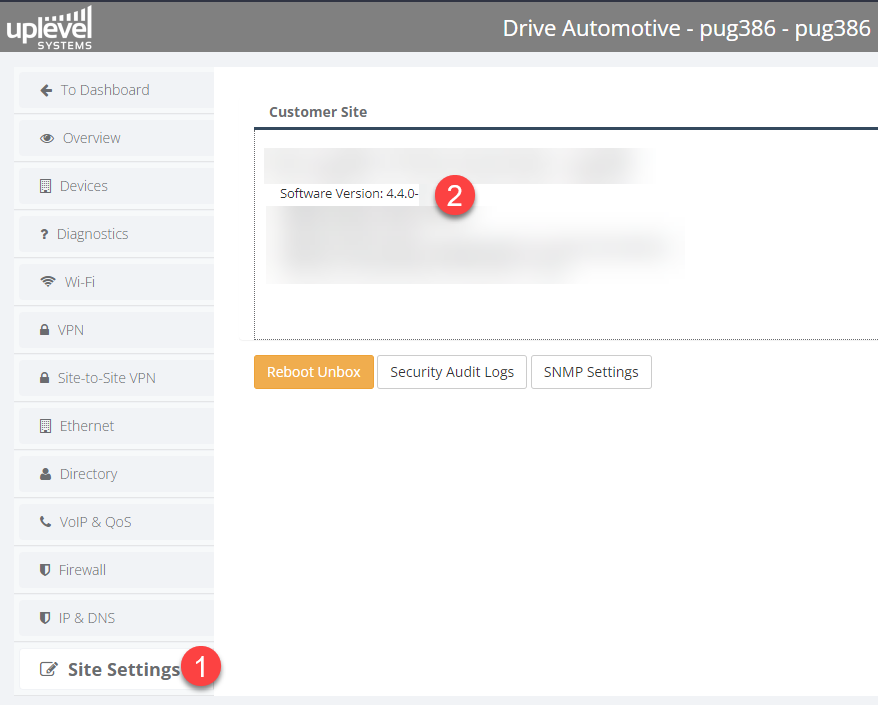
MFA support arrived in firmware version 4.4.0. Check the site’s firmware under Portal › Site Settings before attempting MFA setup.
For the older protocols (L2TP/IPsec, SSTP, SSL), see Client VPN — Legacy.
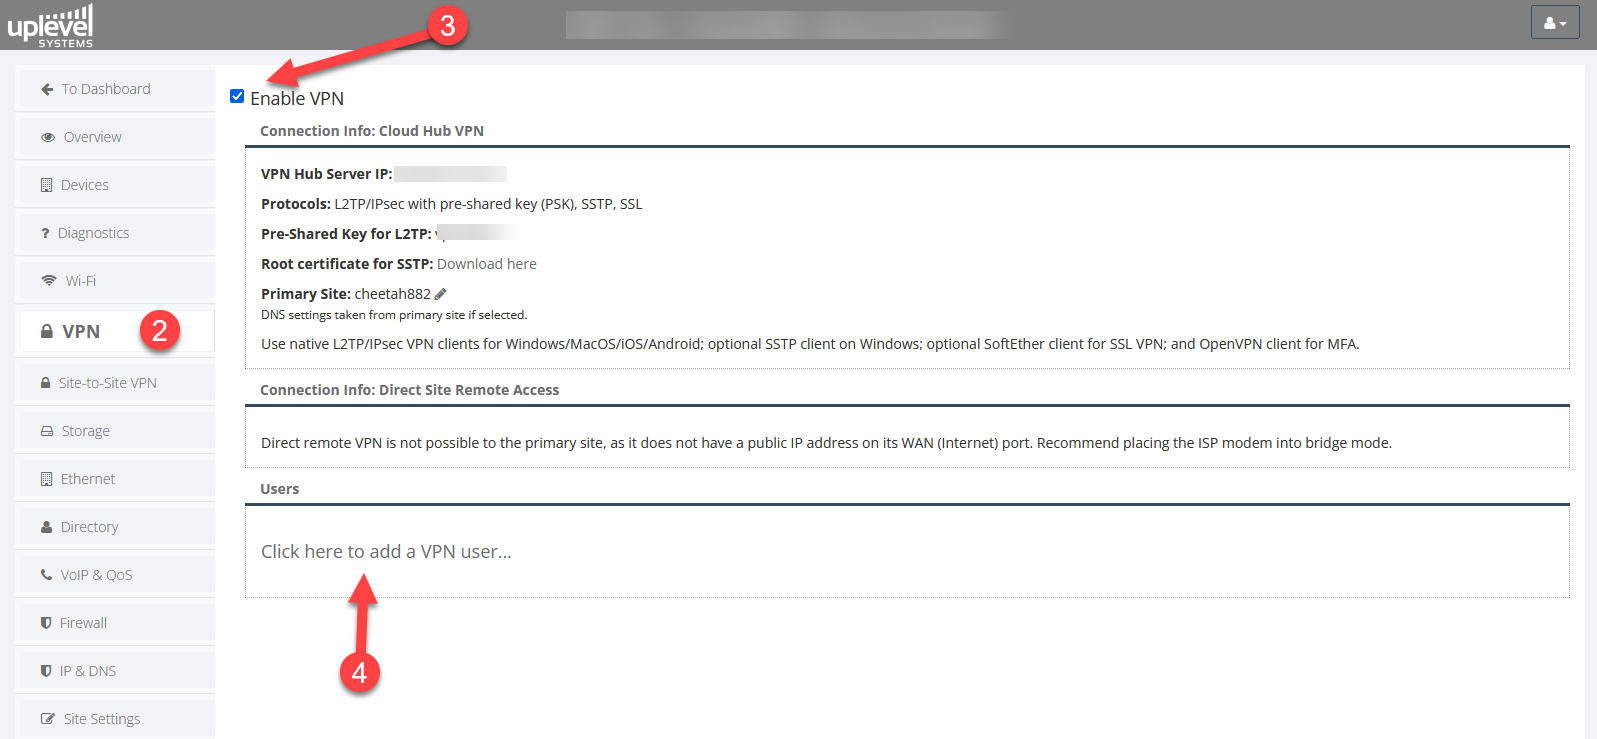
Enable VPN and create a user
-
Sign in to the Uplevel Portal.
-
From the customer’s configuration page, choose VPN.
-
Tick Enable VPN.
-
Click Click here to add a VPN user.
-
Fill in the user’s Username and Password, tick Require MFA, and choose the Security Group the user belongs to.

-
Click Save.
-
Wait about 5 minutes for the VPN configuration and QR code to generate on the backend.
-
Click the edit (pad) icon next to the user.
-
Click Download MFA Files to grab a
.zipcontaining the OpenVPN configuration (<username>.ovpn) and the QR-code PNG (<username>_qr.png).
-
Unzip the bundle and keep the contents handy for the next step.
Install a TOTP authenticator on the user’s phone
- Install a TOTP authenticator app on the smartphone — Google Authenticator is a popular choice; any standard TOTP app works.
- Add a new account.
- Open the
<username>_qr.pngfile on a computer. - Scan the QR code from the phone’s camera through the authenticator.
No smartphone? Either install the Google Authenticator Chrome extension (or 2FAS for Firefox / Edge / Brave / Opera), or contact Uplevel Support for the 16-digit access code that the QR encodes.
Install the OpenVPN client
Windows
If the OpenVPN client isn’t installed yet:
- Open the extracted MFA Files folder.
- Double-click VPNInstaller.exe — it downloads, installs, and configures OpenVPN for the host.
- When prompted, install OpenVPN in the default location.
- After installation finishes, VPNInstaller launches OpenVPN.
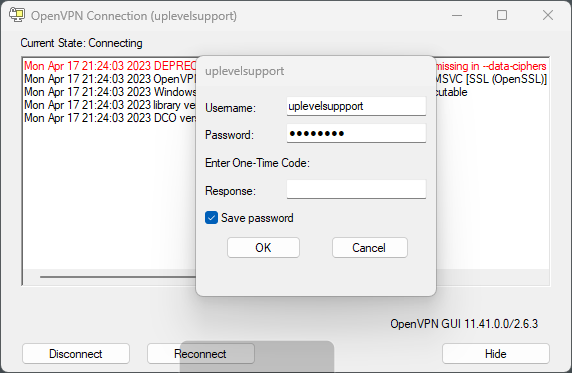
- Enter the Username, Password, and the one-time code from the authenticator to connect.
macOS — Tunnelblick
macOS doesn’t ship a native OpenVPN client. Use
Tunnelblick; it works on every
supported macOS version. Import the .ovpn file from the
extracted bundle.
Linux
OpenVPN is in every major distro’s package manager
(apt, yum, pacman, dnf, zypper). Import the .ovpn
file with your client of choice. The official guide is here:
https://openvpn.net/cloud-docs/owner/connectors/connector-user-guides/openvpn-3-client-for-linux.html.
iOS
Use OpenVPN Connect from the App Store and import the .ovpn
file. Apple’s own guide:
https://openvpn.net/vpn-server-resources/connecting-to-access-server-with-apple-ios/.