Prerequisites
- Two hosts running Windows, macOS, Linux, Android, or iOS.
- Administrator credentials on both hosts.
- Internet access on both hosts.
- For a clean proof-of-concept, the two hosts should not be on the same network — for example, your laptop plus a remote-managed host at another site.
1. First sign-in to the identity provider (Zitadel)
-
Sign in to your Zitadel tenant using the admin credentials delivered to you in the one-time note. The URL ends in
/ui/console. -
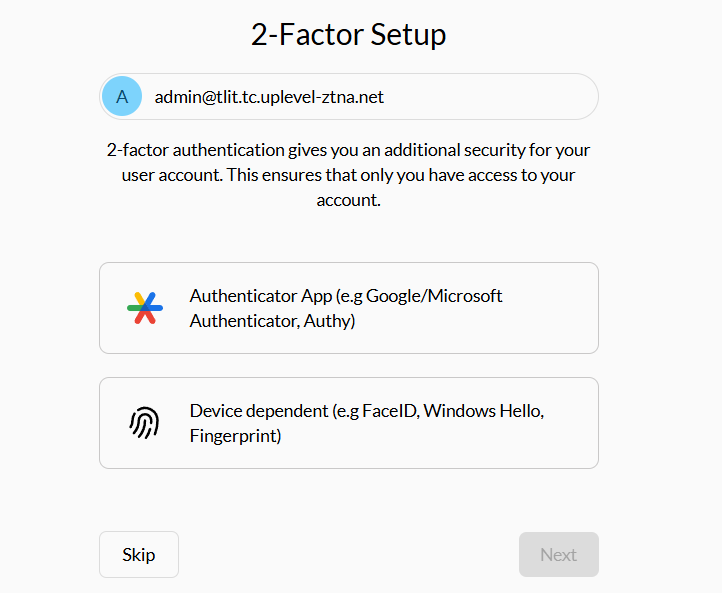
Set up MFA on the admin account immediately.
-
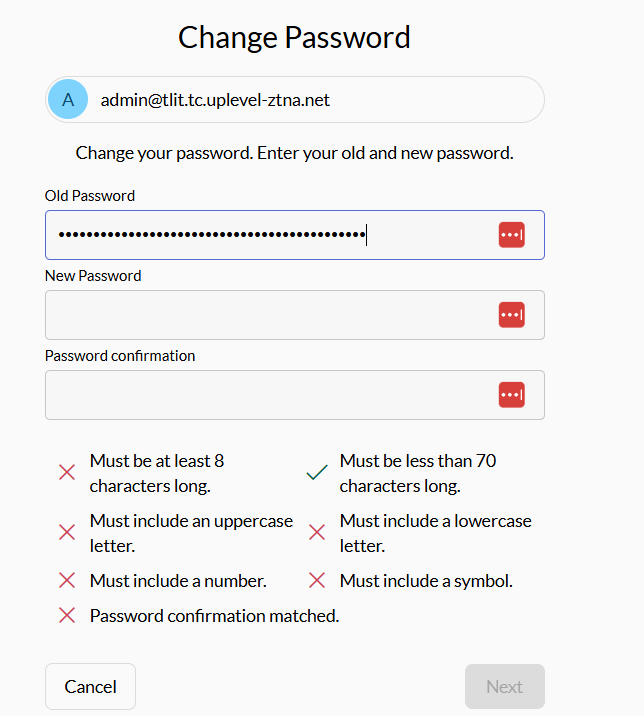
Change the admin password on the next screen.
2. Create your first ZTNA user
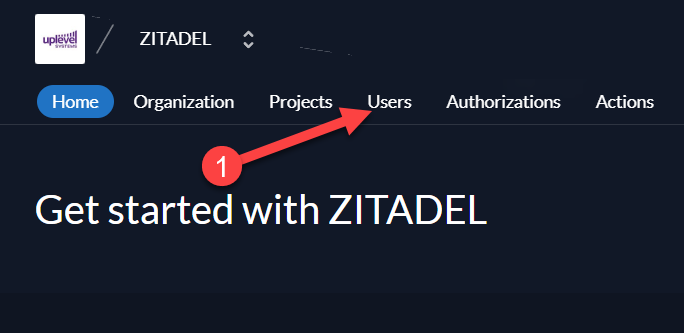
-
In Zitadel, choose Users from the top navigation.
-
Click + New on the right.
-
Fill in:
- User Name
- Given Name (first name)
- Family Name (last name)
- Tick Email Verified. (Configure your own SMTP later to enable invite emails and password resets; SMS / phone can be added via Twilio or similar.)
- Tick Set Initial Password. (The user changes it on first sign-in.)
3. Promote the new user to Netbird admin
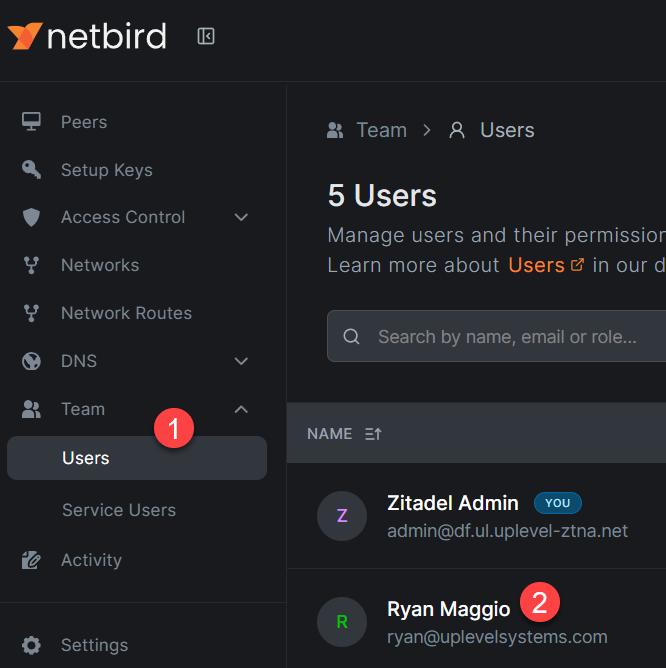
-
Sign in to your Netbird hosts URL (from the one-time note) as the admin user.
-
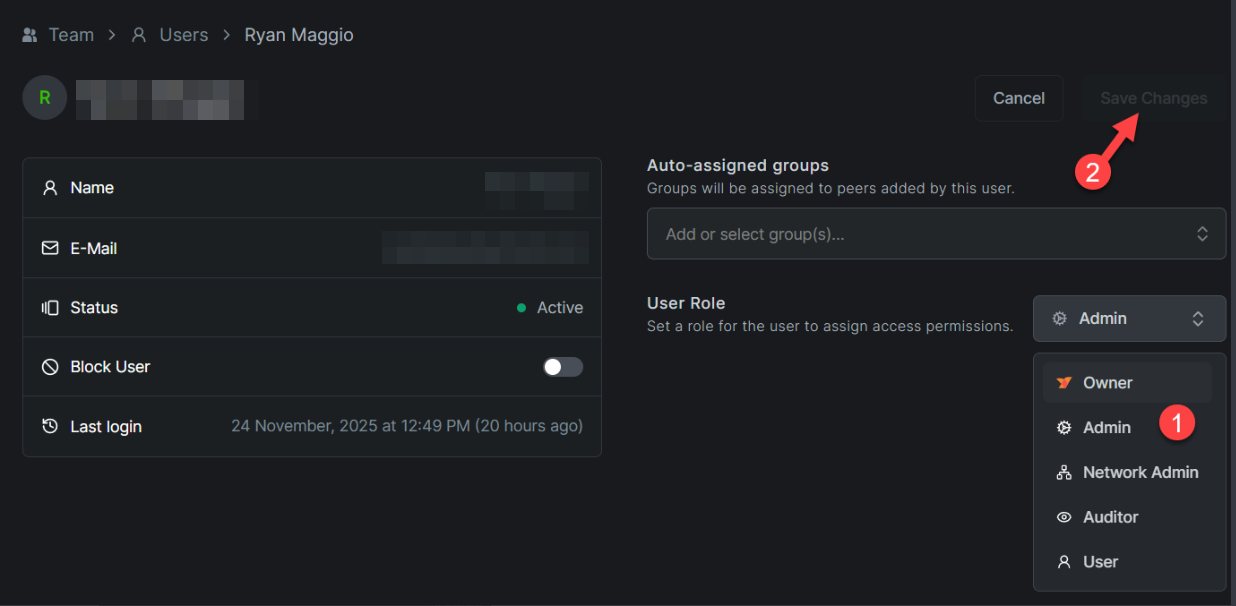
Go to Teams › Users, click the new account, choose Admin, then Save.
-
Sign out and sign back in as the new user.
You should now see the full Netbird UI. End-user accounts should keep the User role — they’ll see a simpler view with copy-pasteable install instructions for their operating system.
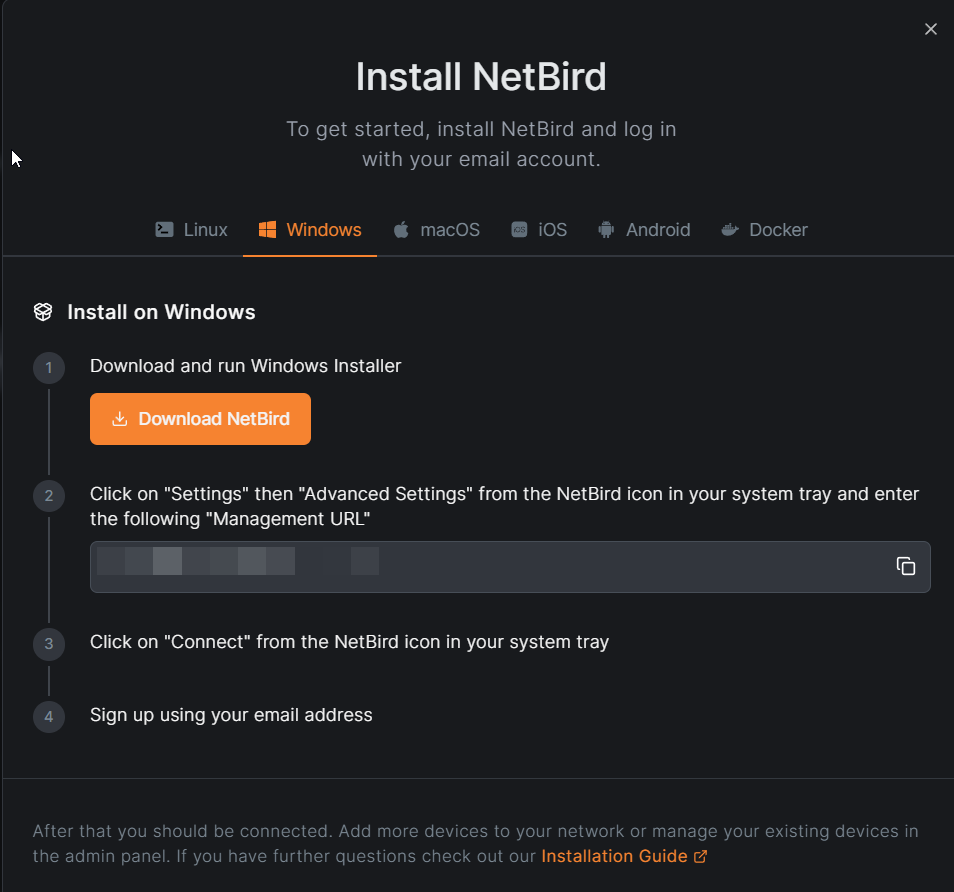
4. Install client peers
From here, follow the Netbird “Install Your First Peer” quickstart to install clients on the hosts. In Netbird, go to Peers › Add Peer to see install instructions specific to the new peer’s OS.
5. Connecting your first devices
After installing the Netbird client on a device:
- Launch and connect. Click the Netbird icon in the system tray (Windows/macOS) or menu bar and select Connect.
- Authenticate. A browser window opens automatically; sign in using the Zitadel email and password.
- Confirm. After successful auth, you’ll see Login successful in the browser.
- Verify. The Netbird icon now shows Connected.
The device gets a Netbird IP (in the 100.x.x.x range). All
connected peers and their Netbird IPs are visible in the Netbird
dashboard under Peers.
6. Test peer-to-peer connectivity
Once at least two peers are connected:
-
Open the Peers page in the Netbird dashboard to read off the Netbird IPs.
-
From one device, open a terminal.
-
pinganother peer at its Netbird IP:ping 100.x.x.x -
Successful replies confirm the secure mesh is operational.
Default policy. By default, the Netbird Default Policy under Access Control allows all peers to communicate. Tighten this once your environment is live; per-resource and per-group policies are the right answer for production.
Headless installs (servers, Raspberry Pi, etc.)
For systems without a desktop GUI:
-
In the Netbird dashboard, open Setup Keys in the sidebar.
-
Click Create Setup Key. Choose Single-use for tight security (one device per key) or Reusable for fleet deployments.
-
Copy the generated setup key.
-
On the headless system:
# Install curl -fsSL https://pkgs.netbird.io/install.sh | sh # Connect with the setup key netbird up --setup-key <YOUR_SETUP_KEY> -
The terminal prints Connected when the tunnel is up.
-
The peer appears in the Netbird dashboard under Peers.
Troubleshooting the first connection
Client won’t connect:
- Verify the firewall allows outbound UDP 3478 (STUN/TURN).
- Some corporate networks block peer-to-peer traffic — Netbird will automatically fall back to its relay servers.
- Check Netbird logs from the tray icon: Advanced › View Logs.
Peer shows as Disconnected in the dashboard:
- Wait 30–60 seconds. Initial registration can take a moment.
- Confirm the device has Internet connectivity.
- Disconnect and reconnect from the tray icon.
For a detailed live status:
netbird status
This shows the Netbird IP, connection type (direct P2P or relayed), connected peers, and routes.
Understanding the network
Netbird builds direct encrypted P2P connections between your devices wherever it can. Traffic flows directly between peers — it does not transit Uplevel infrastructure. When direct P2P isn’t possible (restrictive firewalls or NAT), connections automatically fall back to Netbird’s relay servers.
Your management URL is the Netbird tenant URL from the
one-time note, of the form
https://netbird.yourcompany.uplevelsystems.com. That’s the URL
you’ll pass to --management-url in advanced CLI installs.
Next steps
Read the Netbird Getting Started docs to learn about:
- Creating network resources (subnets, specific hosts).
- Setting up routing peers for remote network access.
- Granular access-control policies.
- DNS settings for hostname resolution inside the mesh.
- Posture checks and security policies.
Once you’ve explored the docs, Uplevel can give you a more in-depth tour and help configure advanced settings for your environment.
SSO — connecting a third-party IdP
To let users sign in with Google Workspace, Microsoft Entra ID, Auth0, GitHub, Facebook, or any other OIDC provider, see ZTNA — Connecting a Third-Party IdP.
Setting up SMTP for email validation
You can also configure SMS/phone, password strength, and notification settings in Default Settings alongside SMTP.
- Sign in to Zitadel at
https://your.domain.uplevel-ztna.net/ui/consoleas the admin user. - Click Default Settings in the top-right.
- In the left navigation, choose SMTP Provider.
- Pick the SMTP service. For ordinary SMTP credentials, choose Generic SMTP at the bottom of the list.
- Enter the SMTP server and credentials.
A note on the roadmap
We’re actively working to make ZTNA management feel like a first-class part of the Uplevel Portal. In an upcoming release, both Zitadel and Netbird will be manageable directly from the Portal via API integration, removing the need to log into multiple consoles for routine operations.
Admin access to the underlying control panels stays available — so you can still:
- Connect your own IdP for SSO (Entra ID, Google Workspace, Auth0, AD, etc.).
- Create complex ZTNA configurations and custom policies.
- Use the full set of enterprise features in both platforms.
Standard deployments should feel simple from the Portal; the underlying systems are production-ready today, and the Portal integration will land without disrupting existing environments.