Overview
MAC Address Filtering controls network access at the layer-2 level. For any VLAN you can configure an allow list or a block list of MAC addresses, giving you granular control over which devices can join that segment.
Allow vs. block — choose one model per VLAN
Allow list (default-deny)
An allow list runs on a least-privilege model:
- Only the MAC addresses on the allow list can connect to that VLAN.
- Every other MAC is denied.
- This is the right model for sensitive segments — payment devices, finance systems, anything that needs hard access control.
Example: a guest Wi-Fi VLAN where only pre-approved devices should be able to join.
Block list (default-allow with exceptions)
A block list runs on a permissive model:
- Every MAC can connect except those on the block list.
- Only the listed addresses are denied.
- This is useful when you need to keep the network open but exclude a specific problem device.
Example: a general office network where you need to keep one compromised device off until it’s been re-imaged.
Creating a filter
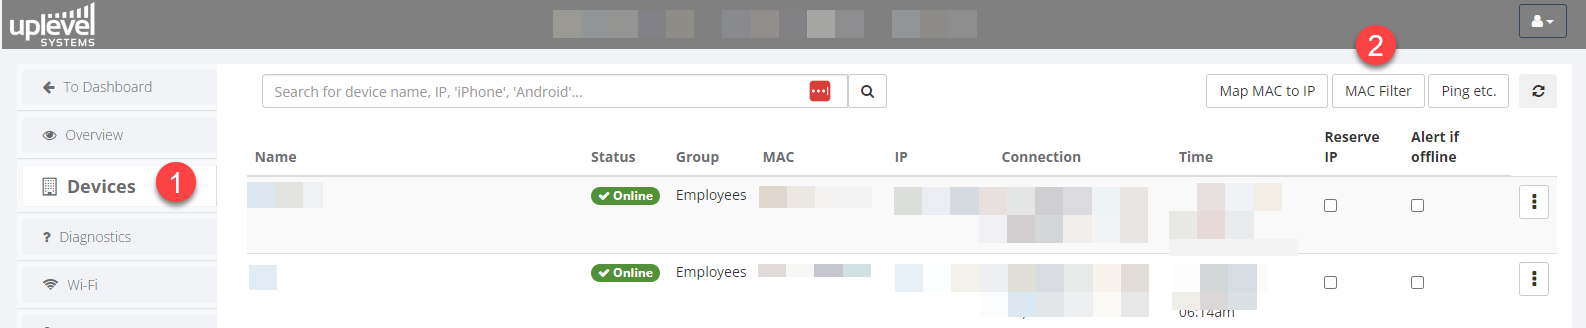
- Navigate to Portal › Devices.
- Click Mac Filter in the top-right of the page.
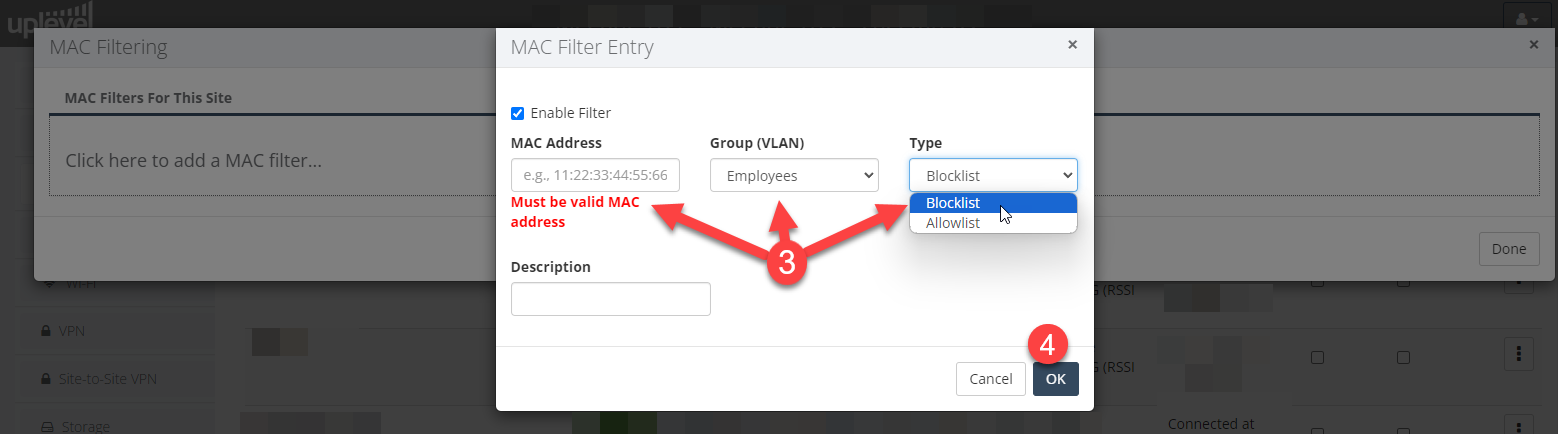
- Fill in:
- MAC Address — in the form
XX:XX:XX:XX:XX:XX. - VLAN — the VLAN number this filter applies to.
- Filter Type — Allow or Block.
- MAC Address — in the form
- Click OK.
Things to know
- Filters are scoped per VLAN. Each VLAN can have its own independent allow or block list.
- You cannot mix allow and block lists on the same VLAN. Pick one model and stay with it on that VLAN.
- When you turn on an allow list, nothing will connect until you’ve populated the list. Plan the rollout so this doesn’t catch you out at 5 p.m. on a Friday.
- MAC addresses can be sourced from device labels, the device’s own network settings, or the gateway’s current DHCP lease table.