Box contents
Before starting, verify that the UAP-101 box contains:
- UAP-101 access point
- 12 V / 2 A 100–240 V power adapter
- RJ-45 Ethernet cable
- Mounting bracket
- Wall/ceiling mounting hardware kit
- T-rail mounting hardware kit
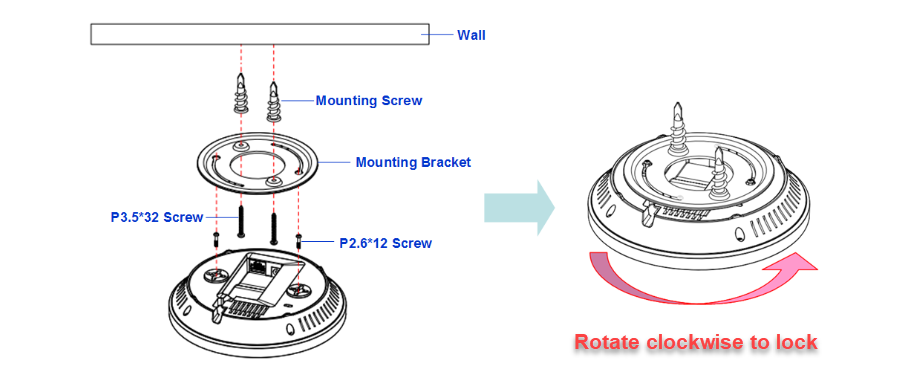
Wall or ceiling mount (bracket method)
-
Attach the mounting bracket to the wall or ceiling using the wall/ceiling mounting hardware kit.
-
Drive the supplied short screws partway into the bottom cover of the UAP-101, leaving enough thread exposed for the unit to engage with the bracket. If you need more clearance — for example, to clear ceiling-tile finish — use the spacers and long screws from the T-rail hardware kit to step the AP off the bracket.
-
Engage the AP onto the mounting bracket and rotate it clockwise roughly 90° to lock it in place.
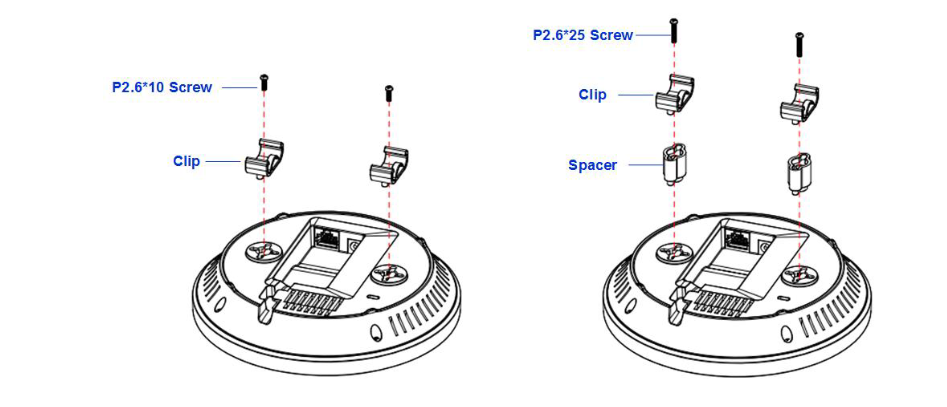
Drop-ceiling mount (T-rail method)
-
Attach the T-rail connectors to the bottom cover of the UAP-101 with the supplied short screws. The kit ships two T-rail sizes: 15/16″ (2.38 cm) and 9/16″ (1.43 cm). If you need to clear the ceiling tile surface, use the spacers and long screws.
-
Align the connectors with a rail of the right size and press the AP onto the rail until it snaps into place.
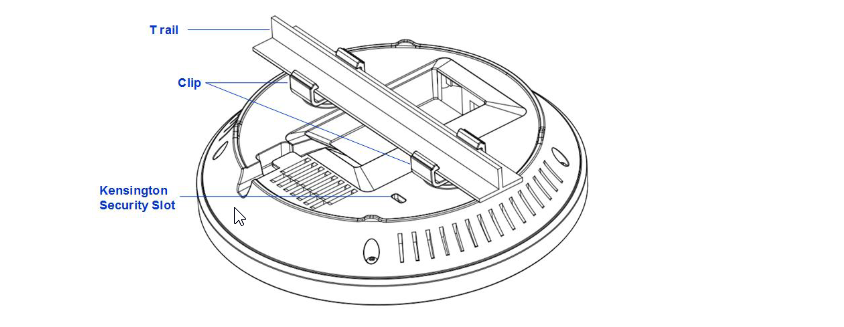
Physical security
The UAP-101 has a Kensington security slot. If the install location is publicly accessible, fit a cable lock (not included).