Introduction
From a workstation’s point of view, the Uplevel Domain Controller behaves like a conventional Microsoft Domain Controller. That means all of Microsoft’s own guidance for Active Directory still applies — for the canonical reference see Active Directory Domain Services. The notes below cover the parts that are specific to running it on Uplevel.
Creating a domain on Uplevel is straightforward, but the dashboard differs enough from a Windows Server setup that the first time through can be disorienting. If you’d like a walkthrough on a video call, contact support — we’re happy to sit through it with you.
Quick-start walkthrough
The video walkthrough covers the end-to-end setup:
- Connect a gateway to the Internet.
- Connect a host computer to the gateway.
- Sign in to the Uplevel Portal.
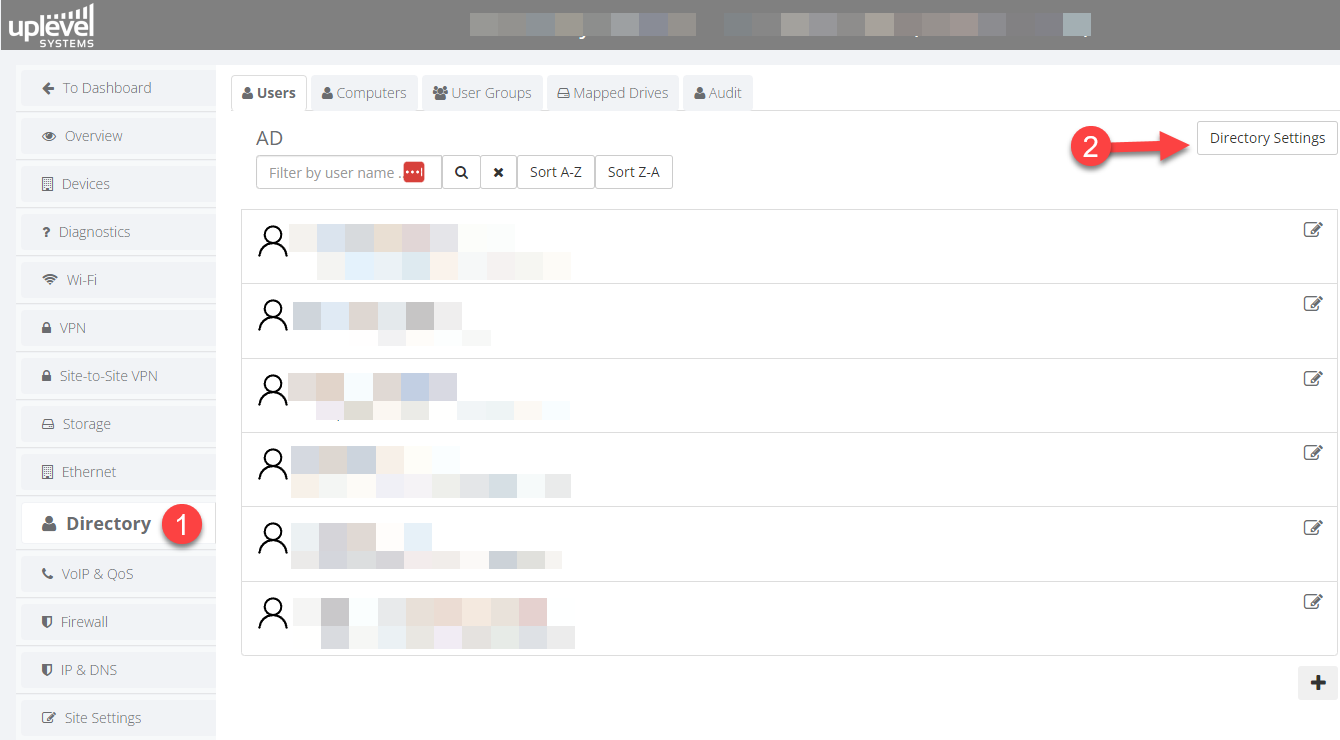
- Create a domain under Portal › Directory.
- Add a computer to the domain under Portal › Directory › Computers.
- Create a user under Portal › Directory › Users.
- Join the workstation to the domain using the standard Windows procedure (see Microsoft documentation).
- Sign in as a domain user to verify.
Under Portal › Directory › Computers, enter the hostname of every computer that will join the domain. To find a computer’s hostname, run
hostnameat the Command Prompt or PowerShell.
Supported client operating systems
Joining the domain doesn’t require any extra software — use the operating system’s built-in domain-join procedure on any of the following:
- Windows Professional or Enterprise
- macOS
- Linux
- Android
- iOS
Windows Home Edition does not support Active Directory. A Windows Pro or Enterprise licence is required to join a domain.
Administration with Microsoft RSAT
Day-to-day domain administration uses the standard Microsoft Remote Server Administration Tools (RSAT). You’ll use the Uplevel Portal only to add users and computers; once an account exists in the directory, manage it from the RSAT Active Directory Users and Computers (ADUC) snap-in.
Starting with the Windows 10 October 2018 Update, RSAT ships as “Features on Demand” — no separate installer required. From an elevated PowerShell, install everything in one shot:
Get-WindowsCapability -Name RSAT* -Online | Add-WindowsCapability -Online
We recommend installing at minimum:

From the LAN side, the Uplevel directory looks and behaves exactly like a Microsoft directory: join a workstation with any valid domain user, then sign in.
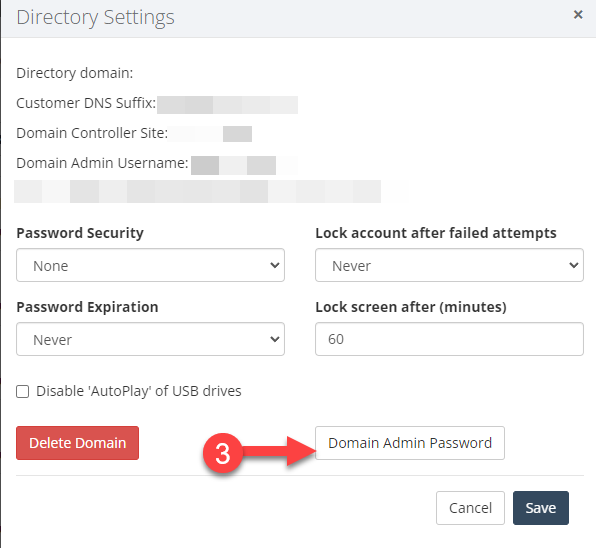
Directory settings
The domain_admin password
The first thing to do in Directory Settings is set a password
for the domain_admin user. Once domain_admin has a password,
that account is what you’ll use to drive the RSAT tools.
Don’t sign in to a workstation as a Domain Admin. Instead, sign in to the workstation with a regular user, and launch the RSAT tools as the Domain Admin with the runas command. This keeps the privileged account isolated from normal desktop activity.
Common group policies to put in place early
Once the directory is up, the policies most sites benefit from configuring up front are:
- Folder Redirection
- Roaming Profiles
- Granular directory permissions
- Audit logging
- Password policy
- Screen lock-out time
- Account lock-out policy
- Restricting access to Command Prompt and PowerShell for end users
- Limiting access to Control Panel options
- Limiting who can install software
- Turning off forced restarts
- Monitoring changes to GPO settings
- Blocking the Microsoft Store
- Limiting access to the Registry
- Centrally managing Windows Defender Firewall
Current limitations
The Uplevel Directory can do nearly everything a small business needs from a Windows Server. A few features aren’t supported yet:
- Multiple-domain forests
- Azure AD synchronization
- Primary/secondary domain controller pairs (in progress)
In the typical SMB environment we have yet to find a use case the Uplevel Directory can’t cover. If you have a specific requirement in mind, reach out to support before designing around it.